Now that I have a prototype that is as complete as I can get it and with and has working game play I decided to post a full timeline of the creation progress below.
During the first week of creating my prototype I was really stressing myself out about how I was going to be able to produce a working game in the small amount of time I had given myself as I had been spending the previous weeks working on my games designs and artwork. After I felt confident enough that my artwork was as strong as I could get it I began to start creating my level prototype in Unit. Following the notes I had made in the previous lectures on how to use this new piece of software really helped me get to grips with the interface and basic processes of creating a 2D game. Placing the painted background and sprites in Unity was a fairly simple process and I got this done quickly. Unfortunately when it got to the part were I actually had to start scripting things to make what I had built so far work I started to struggle. I give it a whirl and immediately kept coming to deadends with what I was doing. I tried again and again to insert the scripts from the 'kit bash' level we had experimented with previously but I was obviously doing something wrong as nothing was working.
Luckily I was able to sit down and have a 30 minute talk to my tutor George about the different assets in my game, it's concept and what I want each element to do. As he is a whiz with Unity he was able to fix every scripting problem I had been stressing over in about 5 minutes. He explained each process to me as he did it and manages to get my game to the were there were inserted collision meshes on the platforms and my sprite was able to jump around the level.
First feedback and iterations
After George had assisted me with my scripting I knew that I needed to talk to my classmates about whether they would be able to play test what I had of my prototype so far otherwise as a important part of the creation process is getting peoples feedback and then making changes due to their suggestions and they may be able to see areas of the level that has faults that you have over looked. Due to my level being very basic and fairly awful at that point in time my feedback from my peers wasn't excellent but I did have one common suggestion and this was that I should make my level longer as it just cuts off sort of half way and doesn't lead to anything at the end. This was a fair point and so I quickly started tweaking the background I had created to make the level longer and to have room for a final goal at the end. Below is what my level looked in my first prototype and how it looked after the iteration work.
Original level

New level


Once I had re designed my level to create a longer prototype and added in the changes I received in my presentation crit session from my tutors I was able to start re working and tweaking my prototype. On my own from what I had learnt from George, I was to add new elements to my level and be able to create collision meshes around all of the platforms (which can be seen in the image below) but I knew I would have to start working on adding in new mechanics to my game to improve it's playability. This, of course, meant more scripting which George agreed to help me with.

After having the two extra 30 minute sessions of scripting work from George I was able to start to improve my game by adding in a large amount of mechanics which made the level play through work far more smoothly than it did before. The new mechanics that were included after these sessions were:
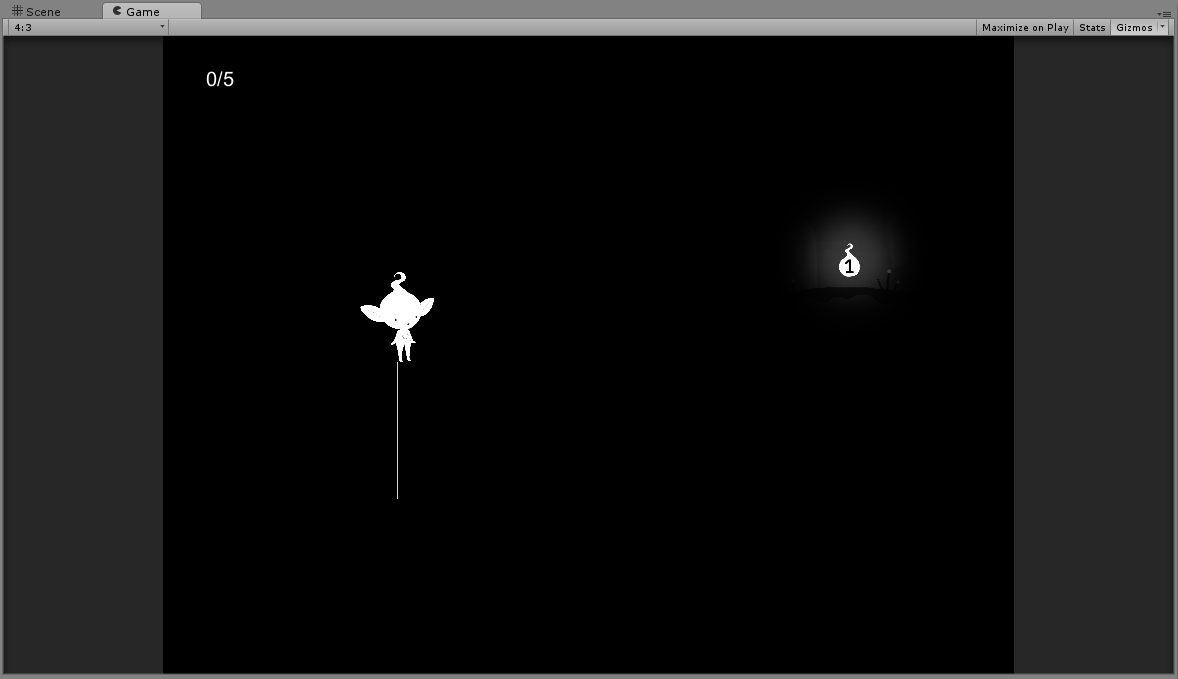
- Being able to collect orbs and when you do, they disappear from the scene.
- After collecting 5 out of the 5 orbs that are in the level Light will be sent back to starting position
- setting up the camera so that it follows the Light as the player moves them through the level.
- Falling into the shadows or hitting the vines will instantly kill Light and sending them back to the beginning of the level.
- Adding a script to the henchmen that allowed them to hit you if you come in a certain radius of them.
Second feed back and iterations
Now that I felt a little bit more confident with the work I had produced and how my prototype had progressed I went to my class mates and, once again, asked them to play test my game to pick up on any flaws or make suggestions as to things I could change. Luckily no one really said that I needed to change anything drastically design or platform wise which was nice to hear but they did have a few inquiries about possible 'bugs' in the prototype.
The most common thing I heard from people was "isn't your game meant to be set in the dark? Are you going to include this or is that not possible?". This was a absolutely essential part of my game that I knew I needed to get done otherwise my prototype wouldn't be remotely similar to the game play I had been writing about. Even though George had created a rough version of this process which I could always use if worse comes to the worse, I did want a full working script otherwise it would make my prototype look shoddy and actually completing the game would be near to impossible.
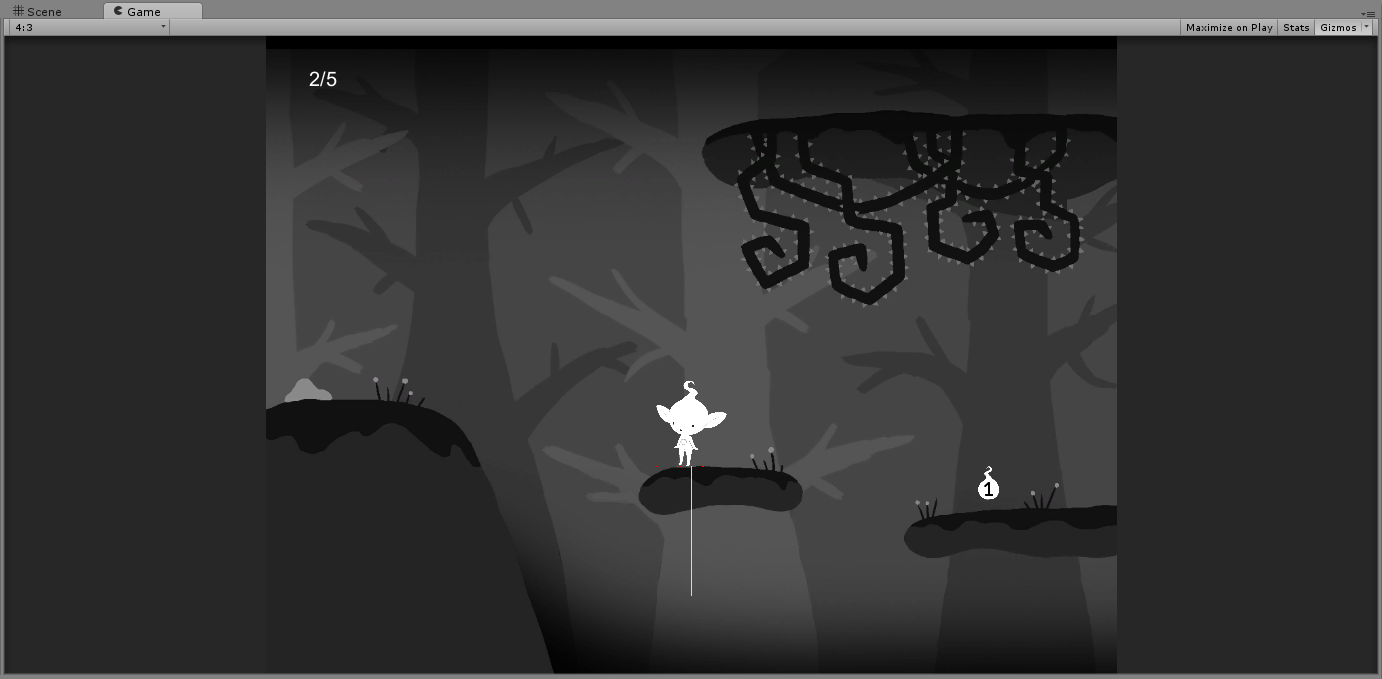
Another point that was raised by my peers when playing my prototype was the fact that the henchmen was able to hit Light but Light couldn't do anything to hit back and would just instantly die, not allowing the player to progress in the level. This unfortunately is another bug within the game that I wasn't too sure how to fix and I did a little research into what the problem might be but I couldn't find anything that would help the situation. So this was something else that I knew I would have to fix otherwise the player wouldn't be able to reach the end goal. An example of the area of the level were you encounter the Henchmen is shown below.
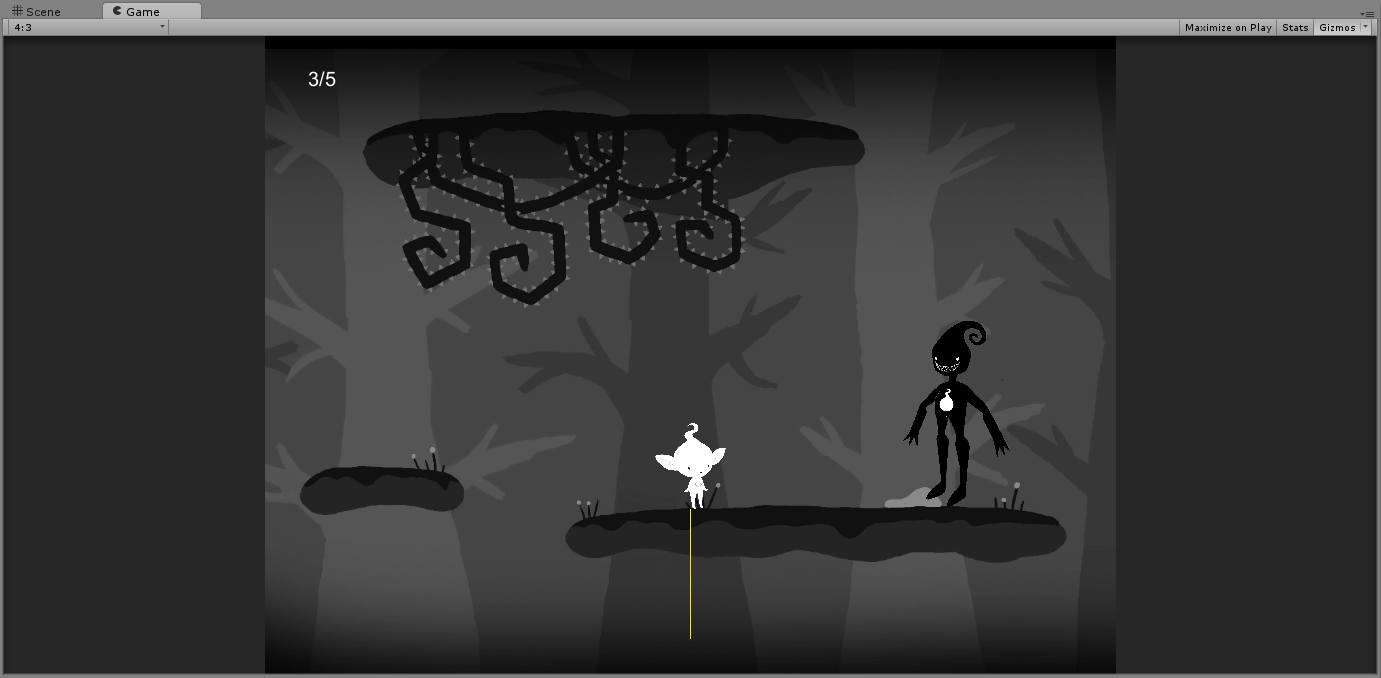
The only couple of things that my peers told me to change so far in my prototype were just very small tweaks that I needed to do on my sprite. The first was to do with the size of Light. People thought that the sprite was a little too big for the environment so I took their advice on board and slightly changed the characters sizing until I was comfortable that it still suited the scale of the level. Secondly I was told to change the elements of the characters jumps height as it was just all over the place when people were trying to manoeuvre around. There is a area of the level, depicted below, where if Light's jump is too high then they will hit the thorny vines every time but if the jump isn't high enough then they won't make the jump down to the lower platform. After this mini crit session I spent a little time editing these elements and then getting people to test the different options until I found a level ground were each 'obstetrical' was no longer and problem.
Final tweaks and scripting for my prototype
After adding changes to my prototype that had been suggested by my peers I decided to start working on my final prototype, trying to get it as good as I could for submission. I started off by trying to work on the fade effect for the prototype because if I didn't get this element down then my game would have no representation of the memory aspect that I had been focusing on since the beginning of the design process.
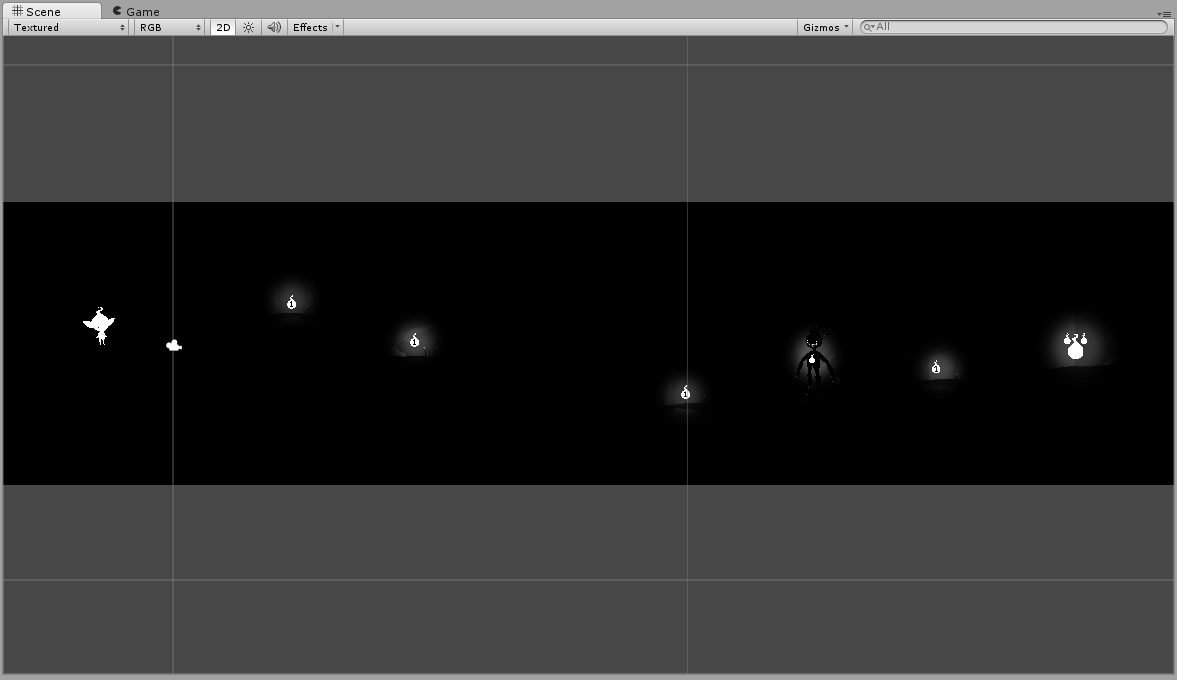
I started off by creating a dark rasterized layer I could place over the top of the level with that areas that I wanted to have glowing, for example the orbs, cut out so you would be able to see the background beneath it. With this new layer created I was able to import it into Unity and place it in front of my original background so that the orbs would show through the blank spaces. An example of the layer I created and how it looked when added to my prototype are shown below.


Unfortunately there were two mechanics in the prototype that I wasn't able to include due to not having enough time or knowledge to complete them. One of these mechanics was for the scene to completely zoomed out to begin with so that the player would be able to see the entirety of the level so they could memorise the path before everything slowly faded to black. The scene would then zoom in on the sprite so that player gets a closer look at what is happening as they move through the level. This is quite a big bit of the aspect to have lost from the game-play as now the player can only see a small chunk of the level before the level turns black which is a tad frustrating but, luckily, due to the glow that the orbs give off, they manage to make a path for the player so I am really happy that that design element worked.
Secondly I wasn't able to create a glow around Light as it would have had to be a constant black rasterized layer that would be seen when the level was still 'lit up' which wasn't exactly the effect I was going for. In the real game Light would give out a soft glow which would allow navigating around the level to be a lot easier for the player but this is just something that I had to move away from. Also the images I used weren't being shown great quality for some odd reason but this was another element that I just had to step back from.
Luckily I was able to sort of the 'scripting error' with the Henchmen so that Light is now able to hit and kill the enemy and the player can move on through the level. It was as simple as lowering the Henchmen's health down from 100 to 3 as Light would have had to hit the enemy 100 times before it was killed which made me feel a tad silly for over looking this simply element but at least it was fixed. Below are some examples of what the prototype now looks like when in game mode but ignore the yellow line. I have no clue why that is there.


No comments:
Post a Comment