Tuesday 27 October 2015

The third mini brief

'Tree house' 


So recently we were told what our next mini brief was going to be about and, unfortunately, it would be related to environment art. I really haven't exactly had the best track record when it comes to this type of concept art creation as drawing environments really isn't my strong point. I just struggle with getting the perspective right and getting depth into my designs, they just end up looking flat and plain so to be honest I was a little apprehensive about this mini project right from the get go but when I heard what it actually was I felt a little more confident in the idea. I have popped the minimal brief we were given below: 


Create a model sheet for a Tree House; using a style, location and context of your choosing. Present texture reference and ensure enough information is evident for a modeller, they will need it…


So essentially what we are being ask to do is complete a few rough sketches of possible tree house ideas, pick which one we want to make into a model sheet and complete that, then pick out some textures which would match what you have envisioned for your design. Luckily the brief really wasn't as bad as I thought it may be, although it does involve environment art, it isn't as technical as the last mini brief was and that is what I found most difficult about it, this is far more creative and doesn't really have any boundaries which is nice. I decided that the best thing for me to do to start off with was finding some image research of tree houses to see what kinda of existing designs there are out there as well looking at some fantasy concept as well for some less realistic designs inspiration. I have compiled a few of the images I really liked into a couple of mood boards and have popped them below.


I think these are a really nice combination of different designs, both existing and fantasy and have given me a little inspiration but at the moment I am kind of struggling to try and think of a specific location and style as it specified in the brief as there are just so many possible options and I don't want to do anything to cliché. I will just have to have a little think about it and see how it goes but for now the next thing I need to do is get some rough sketches down to help my ideas flow and see if I can come up with a design I like.


Sunday 25 October 2015

The beginning of the design process

Thinking about my candy based characters


So now that I have finally decided on what my final studio work idea is going to be and have done some very basic image research and a rough character sketch to help get my designs flowing it knew it was time for me to continue with my research process and start getting some more solid work done. I thought the best starting point for me, which is something that always helps me generate some creative ideas, is to make some mood boards of different types of sweets. I had a basic idea of a few characters I could make based off different types of candy that could pair with a certain emotion but I thought doing some image research may help me expand these ideas and come up with some new and characters designs. So I created a couple of mood boards, which can be seen below, that contain a collection of images of different types of candy and sweets. I tried to get as many different examples as possible without going too overboard as there is a hell of a lot of different sweets out there and I could have spent forever compiling them into mood boards. 


So after creating these two mood boards full of images of candy I started to have a think about the different characters I could create that are based around a certain type of sweet and type of emotion. I was able to make quite a good list of different design possibilities for my characters but obviously I will I won't be using all of these ideas as final character ideas, if I did there Is no way I would have art book done by the end of my third book, so I will try to focus on maybe about 4 or 5 to make into final designs. The list of possible candy based designs I thought of are in the list below.


Sweets & emotions


  • sour apple sweet or cough drops
          angry, bitter, sour 

  • popping candy, fun dip, flying saucers 
         hyperactive, energetic, a little bit mad 

  • lilac sweet, candy floss, marshmallow 
          soft, gentle, sweet, kind 

  • humbug or spearmints 
          smart and sensible 

  • bubble gum or taffy 
          bubbly, friendly, happy 

  • valentines sweets or love hearts 
          passionate, infatuated, hopeless romantic

  • chocolate 
          relaxed, smooth, calm

  • liquorice 
          moody, negative, mute 


When I was making this list I tried to make sure I was thinking about lots of different possibilities for my designs, which is why some of the characters have more than one sweet option or emotional option. I just wanted to make sure I had a good amount of possible design concepts for each character. Also, as I don't want my concept to be too similar to that of 'Inside Out' where each character portrays one certain and key emotion, I wanted to make sure my characters have a little bit more of a mixture when it comes to their emotional state.

Overall I am pretty pleased with the idea I have managed to come up with so far as I think it gives me a really good starting point for possible character designs and I will be able to pick and choose which ones I think are the strongest and I should take foreward as final designs. Obviously this is just the beginning of the design process so these are simply rough ideas at the moment but as I research more and even start to do some sketch work I will be able to expand upon them and make them stronger character designs. Which means now I think the best thing for me to do would be to make a mood board for each of the characters I have thought of above and then try and get some initial sketches down for each one and see where It goes from there.


Saturday 24 October 2015

The beginning of my research

Purchasing some animated movie art books


So this year as I am hoping to be able to produce a mini art book in PDF form for my studio work project. It is going to be quite a task but I think if it is done well it will end up looking really nice and will be a great way for me to get a lot of my design work presented in a neat and professional manor. As this is what I wanted to aim for I decided that It would be a good idea for me to purchase a few professional art books which I could read through and look at for reference and inspiration for when I am in the design process of making my own. 

There were actually quite few art books that I have had my eye on for a little while now but as the list is pretty long and I am a little strapped for cash being a student I decided that I would be easier for my just to go for my top three. All of three of these art books I choose were from 3D animated movies that I had absolutely loved both the plot and design aspects for and was keen to see more of the companies development work. Two of these books were about 'Walt Disney Animation Studios' produced movies called 'Wreck it Ralph' and 'Frozen' where as the other was about a film from 'Dreamworks Animation' called 'Rise of the guardians'.


The purchased art books  


Each of these art books are incredibly detailed with their thought and design process, showing the reader step by step processes of how they character and designs you love came to be and what ideas were scrapped along the way. I am really looking forward to reading all of these art books and looking at all the design work that went into each of these films as I think It will help me work out how much I need to add to my own mini art book and will also help me with layout options and the writing I should include. Obviously my own work won't be on the same kind of scale as these but they are still good to use for my inspiration and just looking at the awesome environment and character art designs. I will be writing a blog post later about what I have learned from these art books and what I will be using for inspiration but I don't think I will be able to add any visual references due to copyright with these books and I don't want to risk scanning in and posting any of the art book pages online but I will see what I will be able to do nearer the time. But either way I have posted photos of the books covers down below in better quality. 


Wednesday 21 October 2015

Continuing with the orrery design process

Ocean orrery final design


So after I had thought about what kind of Orrery I wanted to create and what kind of style and shape I wanted it in, the next step in the process was to start working on a model sheet. This honestly was the part of the mini brief I was little apprehensive about working on as I am really not very good with technical drawings and I knew that this was going to have to be really well laid out and need to explain different things like the mechanics and how my orrery operated, basically information that would need to be passed along to a modeller if this was a design in the games industry, but I am really not too great at this sort of thing. So I decided that to make things easier on myself and whoever was going to look at this model sheet that I would keep it very simplistic and make sure to add things like comments and colours here and there so that It would be easier to understand the design and how it operates. My finished model sheet can be seen down below.


After I completed my model sheet and figured out exactly how my mechanical piece was going to operate, as well as choosing the certain colours that the ocean based orrery would featured I decided to just get on with completing my final piece. I wanted to continue my practice with digital painting in Photoshop for this piece and opted for creating my final piece without any line art and just using simple colours and shading, in order to get the sort of effect I was building up in my disgust piece. I also thought I might be good idea to set a scene for my piece, instead of just having a plain white background like I usually do, and to instead have a go at creating a background. So I decided to just have a little experiment to with textures and shading to try and create a refines, neat final piece which I think I achieved quite well. My final orrery piece can be seen below. Overall I am quite pleased with how this piece turned out, it's not fantastic, but it's a start and hopefully I will be able to improve my digital painting from here.


Monday 19 October 2015

Continuing with the 'Orrery' mini brief

Figuring out what I want to do for my final design 


So after I had done a little research into what a Orrery actually was and had created a single mood board for visual reference and inspiration I decided I needed to start getting some sketches down of possible designs I could create for this mini brief. I quickly pulled up a blank Photoshop page, as I wanted to continue my practice with working with this programme in order to try and improve, and started to roughly start sketching out some ideas. These sketches took me under an hour to produce so I am very slowly getting better at speeding up how quickly I draw I just need to keep practising to get even faster and learn not to spend so long making everything look so clean.

I tried to get as much variety in these rough designs as I could, whilst still sticking with the brief, to make sure I had a good mixture of ideas to go off of and didn't stick with simply just designing a orrery itself. I quite determined that I wouldn't make a character design out of this brief and was going to try to do a object instead so I tried to incorporate the typical design of a orrery into into different objects. I sketches I produced in Photoshop can be seen in the image below.


Although I was quite pleased with how all of these sketches came out as I was able to produce them fairly quickly there wasn't really any of them that were jumping out at me as one I will like to paint for my final piece. I think although they were a mixture of different designs they were all quite typical and didn't really stand out as something more unique. This was a little frustrating as I really didn't want to get caught in the design part of this mini brief for too long as I had lots of other work to be done for my research report and studio work and didn't really have time to waste. But luckily a conversation I had with my friends, which was related to our project, was able to help me spark an I idea for a design of a orrery I could produce.  


My orrery design idea

A few of my classmates and I whilst thinking about our orrery brief were discussing the fact of how it is interesting that human beings now know more about space than they do about what's at the bottom of the ocean. It was mulling over this fact that allowed me to come up with an idea for my orrery design that I actually really liked. What if I swapped out the concept of using planets in an orrery and instead used deep sea creatures, like fish and large sea dwelling mammals? I thought this would be a really nice unique twist on the orrery brief that still sticks to its very vague guidelines. I then, focusing on this topic, started to think about how this could work as a design. I had a few brief concepts that were a little average but then I thought up a design idea that I thought could work quite nicely.

This design would consist of a large central column in the middle the machine that will be a coloured gradient of the shade blue, with light at the top and dark at the bottom to signify the ocean. They, around this column will be bands of different heights and on each band will be one sea creature. These sea creatures will be placed in order of height based on which depth in the ocean they can be found. This was just a really basic first design concept but I thought it could work really nicely.

As this was the idea that I was now completely set on designing as I thought it would be a good idea to do some brief image research into the topic to make sure this concept was doable. Unfortunately the large amount of images I found related to the topic of depths of creatures in the ocean were all very poor and looked like something out of a child's text book. The ones that I have put below are the best images I could find out of a very limited bunch and hopefully will designs as I need to get my information right when it comes to were each creature needs to go in order of height. Now that I have some very basic image research to help fuel my design idea and help me with drawing out my orrery concept I am now able to move onto getting some more solid drawing work done for this mini brief and then  can hopefully make a start on my model sheet and final piece.


Saturday 17 October 2015

The second mini brief

'Orrery' 


A few days after we completed our Insect mini brief and had a little resting period our tutors gave us a new project for us to be working on along side our studio work and research report. Similar to that of the Insect project we were only given one word to go on, nothing else. No specifications, no further details, just the word 'Orrery'. At first I had absolutely no clue what a orrery was but I thought I had heard the word before so I did have to have a little look on Google to see what we were being asked to design. Although I may have been a little confused to begin with as soon as I saw photographs of an Orrery I knew exactly what it was but I did think it was a little bit of a bizarre object for us to be asked to design. But even so it helps with our technical drawing and working with being asked to create something that we wouldn't have even dreamed of working on previously so it does have it plus sides. 

I decided that after having a look at some different images of orreries that I should compile the designs that I liked into a mood board so that I would have all my chosen images together to look at for references and inspiration when it comes to creating my own orrery. The mood board I made can be seen in the image below. 


I decided before I jumped straight into sketching some idea I should have a read up on the definition of a orrery to make sure that my design sticks to the 'brief' as it were and that I don't create something that doesn't relate. A paragraph taken from the wikipedia page on orreries (https://en.wikipedia.org/wiki/Orrery) says that 'An orrery is a mechanical model of the solar system that illustrates or predicts the relative positions and motions of the planets and moons, usually according to the heliocentric model. It may also represent the relative sizes of these bodies; but since accurate scaling is often not practical due to the actual large ratio differences, a subdued approximation may be used instead.'

Although this may be the definition of a orrery, our set 'brief' didn't specify what exactly we had to produce by the set deadling. We could end up making a character design based around a orrery if we really wanted to, it is completely up to us. So baring this in mind now what I need to get some sketch ideas down to try and come up with a final concept using the mood board I made as a reference.  


Wednesday 14 October 2015

Completeting my Leaning Agreement

What I plan to do for my studio work and research report 


This is fairly self explanatory blog post to be honest so I won't write as much as a I usually do. Recently we were asked to complete a Learning Agreement for what we planning to be focusing on for both our studio work and research report. Essentially we simply have to write about what we want to produce by the end of the year, how will it fit in with the learning objectives and what our schedule of work will be. We have to be fairly vague but still detailed if that makes any sense due to the fact that if you were to write that you were certain you were going to produce a particular piece of work and you actually didn't get it done in time but it is still written on your leaning agreement then you will get marks bumped off your grade. So basically you had to keep it short and simple and not too in-depth and my finished Learning Agreement is posted below.


Thursday 8 October 2015

Having a quick character drawing practice

A rough design of 'Bubblegum' 


So after I finally figured out what I would be focusing on for my studio work project after a long period of brain storming and before I start doing any research into my chosen theme I decided to produce a sketch of what one of the characters could possibly look like just off the top of my head in order to get the ball rolling and get down my initial design ideas.  

I started off drawing out the design of one of the character I thought about as a initial design since deciding what my project was going to be which was the character 'Bubblegum'. Bubblegums's personality is meant to be happy, bubbly and friendly so I had these as a good starting point to their design as well as the idea that they are meant to represent that sweet itself so I decided to just work off of these initial ideas and see what I got. My final pencil sketch can be seen in the image below. 


Drawing this character was basically just for my own benefit to try and help solidify my ideas and see if I could get a good first initial design from the theme I am deciding to work with. I know for this project I want my designs to be a combination of both cartoon and anime, which is what my usual character design work consist off as it is two things I really love and so this was something I was baring in mind whilst drawing. I had had some initial design ideas when I first thought up the concept of this character which I really wanted to try and draw to see what it would look like. For example I wanted their hair to actually be made of bubblegum so it would have a gloopy look to it and possibly including having circular spheres incorporated into it somehow to make it look like blown bubblegum bubbles. 

So with this pencil sketch complete I decided that it maybe fun for experimentation to scan the drawing in and have a go at painting it in Photoshop in order to have a little play with colours and to try and see if my idea of matching core emotions with core colours and facial expressions was going to work. I initial did some very brief image research on the candy Bubblegum just to get a feel for the colour scheme that is used which is mainly highly saturated pinks and blues so these were shades that I knew I needed to incorporate into my designs. The colour pink was going to be my main colour though as it is the shade is the most recognisable for bubblegum.   


So once I had had a look some quick image research and references to do with Bubblegum, I scanned in my character design sketch and imported it into Photoshop. I decided to, as I had been practising not using solid black outline in my pieces recently, to continue with this theme and just work in blocking out the different colours for the character instead of spending forever on completing an outline. Seeing as this is a practice piece anyway I knew I didn't have to go into shading either which made things a lot simpler and quicker to do and also allowed me to have a little practice with the style of vector that my tutor Nigel and I had spoke about my possibly looking at in the beginning stages of idea development. My block coloured version of my scanned in sketch can be seen in the image below. 


I tried to incorporate both of the well known bubblegum colours into this design, with pink as the predominate shade, in order to really try and get across what the character was and I found that this colour combination worked really nicely in order to make her fit into the bubblegum theme but I also felt like something just wasn't quite right with the design as a whole. I wasn't interiorly happy with how I had drawn the hair on the top of her head as It just looked like it was lacking something to me personally so I decided that I needed to change it from what I had drawn in the original sketch. When I was roughly sketching out a possible new hairstyle in Photoshop I suddenly had a design idea that may fit the characters theme perfectly. 

As I am going for an anime influence in my character designs and I wanted this character to have spherical shapes in her hair to represent bubbles, which I had already incorporated in her plaits,  I decided that I should give her ridiculously huge buns in her hair. This way it would give the piece a better sense of symmetry and really help to bring across the idea that she is meant to represent a certain type of candy as the buns in her hair end up looking like blown bubblegum bubbles.  Below is my final practice character design for Bubblegum with the redesigned hairstyle alongside a alternative image I used to post on my Facebook page. 


For a beginning design to get the ball rolling and just have an experiment with my theme I am pretty pleased with how this piece has turned out as it has really captured the typed of style I would love to work in. But obviously I am not setting the art style in stone as I will have a lot of experimentation work to produce of different types of design styles once I have started looking at artistic and game influences. As well as doing this I need to do a lot more more research on different types of sweets and candy which is going to be the next part of my studio project that I need to begin working on. 


Sunday 4 October 2015

Progressing with my studio work

Figuring out what I want to do 


So from my last studio work session I had finally come up with a starting point for what my project could be, the only trouble is, I still don't have a theme for my characters designs. As character concept art is such a broad area full of lots of different possibilities I am finding it very very difficult to narrow it down to something specific that I both have a personal interest in and have the motivation to want to work on. Although I am not dead set and certain on a theme, from the brain storm I had in my previous taught session I know that there are 2 things that I would like to try and focus on producing for my studio work project. These are: 


  1. Create a neat mini version of an art book in PDF form 
  2. Creating expressive character designs that focus on the use of colour and emotions/mood  

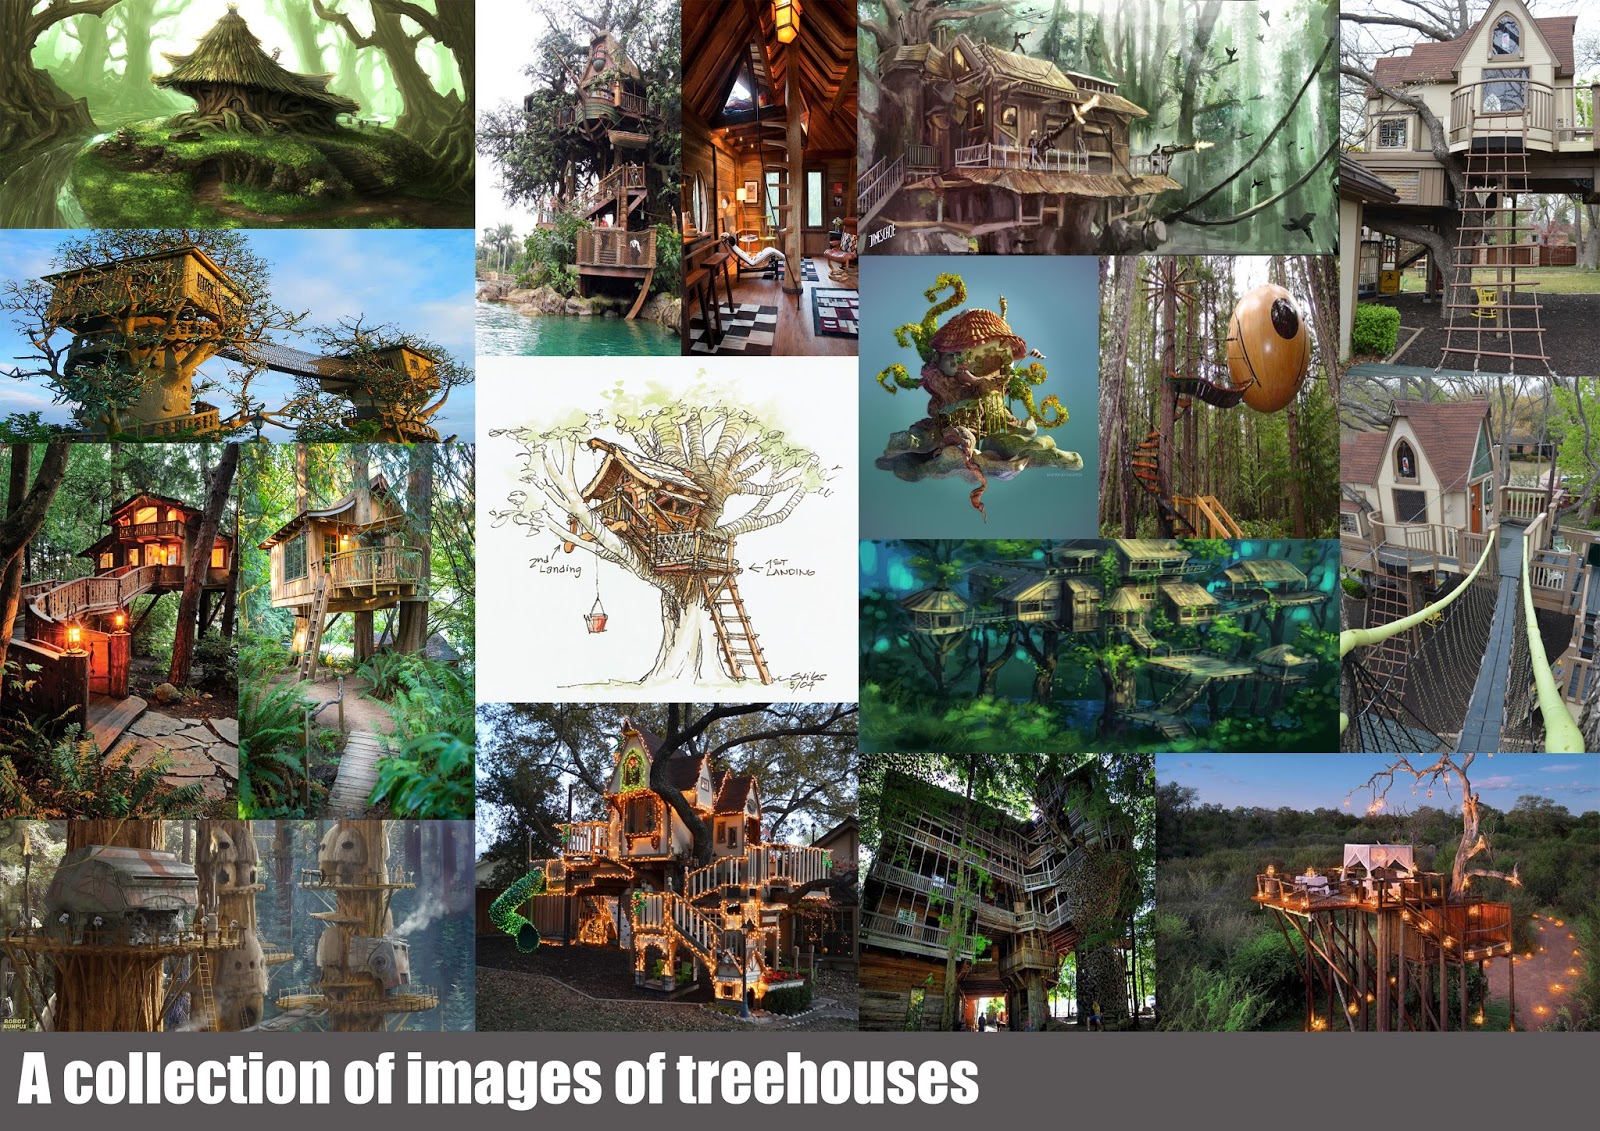
Baring these themes in mind I decided to start off with some very simple image research to try and get some creative ideas following and to see if it could spark a concept or a theme that I could work from. Like with nearly every other university project I have completed I started of my research by compiling a mood board of images that I could uses as inspiration and to try and help influence my work. The mood boards I started working on consisted of different character designs, both 3D and 2D  that are a combination of either fan art, 3D and 2D film characters, 3D and 2D game characters and anime. This was in order to get a broader range of design styles and inspiration so I wasn't limiting my ideas to just one genre. The mood boards I made can be seen in the images below. 


There are a lot of characters in these mood boards that I really love the designs for and I usually have a peak at when I am coming up with new ideas and sketches to get my creative concepts following but there are I couple of characters I have added into my mood boards that I loved as soon as I saw them and I think they relate nicely to one of the ideas I want to be focusing on for this project. 

The idea of colour coding a character a certain way in order to them portray a certain emotion has recently been focused on in the new movie by 'Pixar Animation Studios' called 'Inside Out'. Inside out is a 3D animated comedy adventure and drama movie that was released in 2015 that grossed $90.4 million in its first weekend. The film focuses around an eleven year old hockey loving girl called Riley and the little voices inside of her head. These little voices are Riley's emotions, Anger, Disgust, Joy, Sadness and Fear and they are in control of guiding her choices and keeping her well balanced. But when Riley's has to move to San Francisco from her home town in Minnesota due to her Dad's new job Riley starts to face the troubles and difficulties of living in a new town. This includes a new school, new friends, new home and leaving everything she new and loved behind and let's just say it's a hell of lot for her emotions to finally become comfortable with all this change. 


Riley's emotions all take a humanized form and, as well as the way they move and express themselves, they are each colour coded to what emotions they are meant to portray. So Joy is a light shade of yellow whilst Sadness is a dull shade of blue. It is fascinating just how many people, probably ever since they were very little, have linked different shades of colour to match different types of emotions. If you went up to someone on the street and asked them what the colour red would be if it was an emotion, I would grantee the majority of people would say anger and this is exactly what the creators at 'Pixar' conned onto. They know that people see red as rage and yellow as happiness, it is just a colour coding basic as it were that people seem to stick to when it comes to character design. 


I am a really big fan of the film Inside Out due to their use of expression and colour and I would love to try and incorporate something similar to this design premiss into my project work. But the tricky part now is trying to think of a theme that isn't too similar to that of Inside Out but still allows me to have characters with each have their own distinct personalities, based off of one core emotion and also having a colour palette to match.  

After thinking about it for a little while I did have a basic concept that could work with this theme of colour coding a character in order for them to portray a certain emotion, it was to have each character as a different type of weather. So for example rain could be miserable and sunny could be happy and hail could be grumpy. I thought this was quite a good premise but when it actually came of thinking about the colour scheme for these character I realised they would probably actually end up being quite dull when I really wanted to aim for something more bright and eye catching so I decided to keep this idea as a back up instead. As to try and get some design inspiration I had another look at my mood boards to see if they would be able to spark any ideas for me as to what my character design theme could be. There was one picture in particular, of a character design I have loved for years, that did actually help me think of a solid design idea I could use to help with portraying emotions and colour. 

One of my favourite artists 'Meago' (http://meago.deviantart.com/) for a few years now has been producing her own personal series of designs called 'Dollicious' which are of female characters that are based on different types of foods. Meago looks into a different variety of different food and drink to create her dollicious designs which usually consist of a mixture of both sweet and sour tastes. One of her original concepts and one of the most popular character designs she made is 'Ramen', a girl with noodles for her which is massively popular online. One of her pieces of concept art of Ramen, as well as chibi designs of the other dollicious girls, can be seen below. 


Looking at these cute and colourful designs put a smile on my face simply due to the fact that they are based around food and drink that I recognise or have eaten and so, in a odd way, they are personal too me which gives them a really nice touch. Having a look at these different designs lead me to think about the types of food that I personally enjoy to eat and a large amount of these were sweet, seeing as I have a huge sweet tooth and were mostly different types of candy or cake. Thinking about this is what sparked my idea for something that I could work on for my studio project that I actually really liked that sound of and felt pretty excited at the prospect of producing.  


My final studio work idea

My concept for my studio work is to create a set of characters who were all based around different types of sweets and each character will have their own distinct personality traits. So some examples of possible character designs could be: 


  • Bubblegum - Bubbly, happy, friendly. 
  • Sour apple - Grumpy, bitter, moody. 
  • Popping candy - Hyperactive, energetic, crazy.

I already have a load of different ideas for types of candy that I could match with different emotions so I think I will be able to create around 4 - 8 final character designs which will hopefully allow me to get loads of good design iteration work into my mini art book. Focusing on this theme will also allow me to explore the idea of colour coding my different characters to try and help them portray their specific emotions although I might not stick to the traditional colour schemes of having red as anger and yellow as joy, it might be fun to switch it up a little bit and portray their personality through their body movements and facial expression instead of just relying on colour.

Since I thought of this idea I have been really excited to start working on it as I know I will be able to get some really nice character designs out of it that will fit my preferred art style. I am just pleased to have found an idea which I know I will be motivated to work on all year round. I even thought up a couple of names for the mini art book I want to produce whilst I was brainstorming character ideas which at the moment are 'Sweet Tooth' and 'Pick & Mix' but these may change obviously as my project progresses. 


Some reference images of Pick & Mix candies


Now that I have a clearer idea of what I want to be focusing on for my studio work I now will have to think about my what my idea is in a far more detail in order to try and finalise it a little more and plan out exactly what I am going to be doing and producing at the end of the year. I am actually really excited about starting to work on this idea now as I have chosen something that I have a personal interest in due to the art style I hope to be using, the use of colourful sweet candy and focusing on expressions. I just hope my confidence for this project shows through in the work I will produce. 


Thursday 1 October 2015

Finishing the mini brief

My 'Insect' final piece 


After I had completed the research and design process of the 'Insect' mini brief I knew it was time to move onto creating my final piece. Due to the basic silhouette designs I had made earlier I now knew what kind of design I wanted to be working towards when it came to creating my creature as I could pick pieces out of the different silhouettes and incorporate them into my final design. 

What I really needed to do now was draw a subtitle pose, draw the armour and clothing on top and then colour it. Usually I would completed this process by drawing it all out in my sketchbook with a pencil but this time around I wanted to challenge myself and see if I could draw straight into Photoshop using my tablet. This is usually something I find a little tricky to do as I never thinks it looks quite right but It is so much easier to edit a piece when it is done digitally and I really want to practice my digital work so this was a good opportunity to do so. Also the reason I have chosen Photoshop is because it is a industry preferred programme so the more I can use it the better. 


My final piece for the 'Insect' Mini Brief 


Completing the piece took a little longer than I thought it would as I am still a bit of a photoshop novice and I really wanted to spend a lot more time refining it and getting it up to a quality I was happy with but, at the end of the day, this was just a mini brief and It just needed to be done and then moved on from as we still have a large amount of work to do for our main project which is the most important thing. Overall I think it turned out okay, I was happy that I was able to incorporate both nature and insect parts like the Conker shell shoulder pads and the stag beetle armour and also focusing on creating another piece that didn't use outlines and was just practising with colour and shade, like what I did for my painting of 'Disgust'.  

Now that this mini brief is completed I must move on and focus my attention on my research report and studio work in order to make sure that I don't fall behind and keep my ideas flowing.